Jenkins Freestyle Project for DevOps Engineers

I am a Certified AWS Cloud Practitioner and heading towards becoming a Devops Engineer.
What is CI/CD?
CI/CD stands for Continuous Integration/Continuous Deployment or Continuous Delivery. It is a software development approach that involves frequent and automated building, testing, and deployment of code changes to production environments.
Continuous Integration (CI) is the practice of regularly integrating code changes into a shared repository and running automated tests to detect errors and conflicts early in the development cycle. This ensures that code changes are integrated smoothly and that any issues are detected and resolved quickly.
Continuous Deployment (CD) or Continuous Delivery (CD) is the practice of automatically deploying code changes to production environments after they have passed all necessary tests. This enables developers to release new features and updates quickly and frequently, which can improve the quality of software and accelerate the delivery of value to customers.
CI/CD helps to streamline the software development process, improve the quality of code, and reduce the time it takes to deliver new features to customers. Jenkins is a popular tool used for implementing CI/CD pipelines.
What Is a Build Job?
In Jenkins, a Build Job is a unit of work that represents a specific task that needs to be executed. It defines a set of instructions or tasks that Jenkins will perform when the job is triggered, such as compiling code, running automated tests, and creating artifacts.
A Build Job typically consists of a series of steps that are executed sequentially or in parallel. These steps can include source code checkout, build compilation, testing, artifact creation, and deployment.
When a Build Job is triggered, Jenkins will execute the defined steps in the job, and if any of the steps fail, Jenkins will mark the build as failed, and the developers will be notified. On the other hand, if all the steps pass successfully, Jenkins will mark the build as successful, and the artifacts produced by the job can be used for further testing or deployment.
Build Jobs are an essential part of the Continuous Integration (CI) process, as they enable developers to automate the build, test, and deployment process, which can help to reduce errors, increase the speed of delivery, and improve the overall quality of software.
What are Freestyle Projects?
Freestyle Projects is a type of job in Jenkins that allows developers to create custom build jobs with a high degree of flexibility and customization. It is one of the most commonly used job types in Jenkins.
Freestyle Projects provide a graphical user interface (GUI) that enables developers to define and configure a set of build steps and actions that Jenkins will perform when the job is triggered. These build steps can include actions such as source code checkout, build compilation, testing, artifact creation, and deployment.
One of the key advantages of Freestyle Projects is that they provide a high degree of flexibility and customization. However, Freestyle Projects can also be more complex to set up and maintain than other types of jobs in Jenkins, such as Pipeline jobs.
Overall, Freestyle Project is a powerful and flexible way to create custom build jobs in Jenkins, and they remain a popular choice for many organizations.
Before starting to build a project, let's see some common terminologies used in Jenkins:
Job: A job is a unit of work in Jenkins. It defines a set of instructions that Jenkins will execute, such as building, testing, and deploying code.
Build: A build is an instance of a job that Jenkins executes. It includes all the steps and processes defined in the job.
Pipeline: A pipeline is a set of jobs and their interdependencies that represent a software delivery process.
Stage: A stage is a step in a pipeline. It represents a specific phase in the software delivery process, such as building, testing, or deploying.
Plugin: A plugin is a piece of software that extends the functionality of Jenkins. There are thousands of plugins available for Jenkins that can be used to add new features or integrate with other tools.
Slave: A slave is a node in the Jenkins cluster that is used to execute builds. Slaves can be physical or virtual machines and can be located on-premise or in the cloud.
Trigger: A trigger is an event that initiates the execution of a job. Triggers can be manual, such as clicking a button, or automatic, such as a code commit or a time-based schedule.
TASK -01
- create an agent for your app.
Set up your Jenkins server and open the dashboard.

From the dashboard click on Set up an agent, it's very very easy to set up an agent, just go through this video.
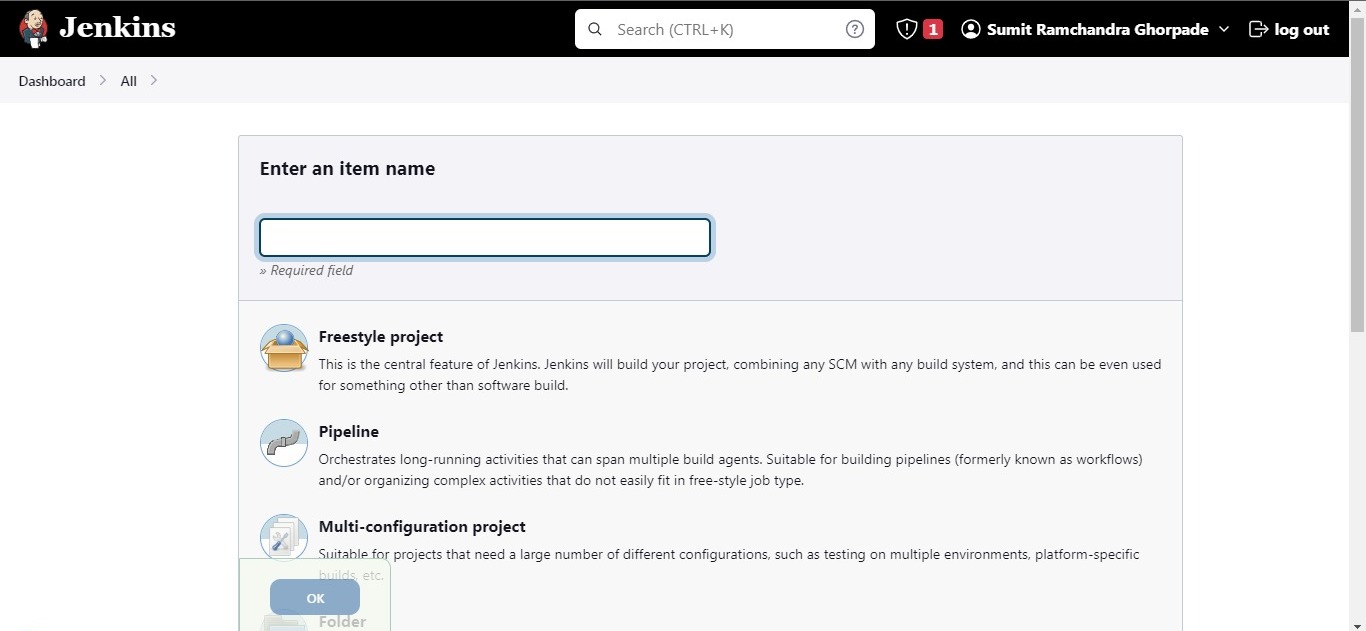
- Create a new Jenkins freestyle project for your app.
To create a new project click on Create a job. Give the project name, select the freestyle project and click on ok.
Configure project details-
Describe your project as per your need.

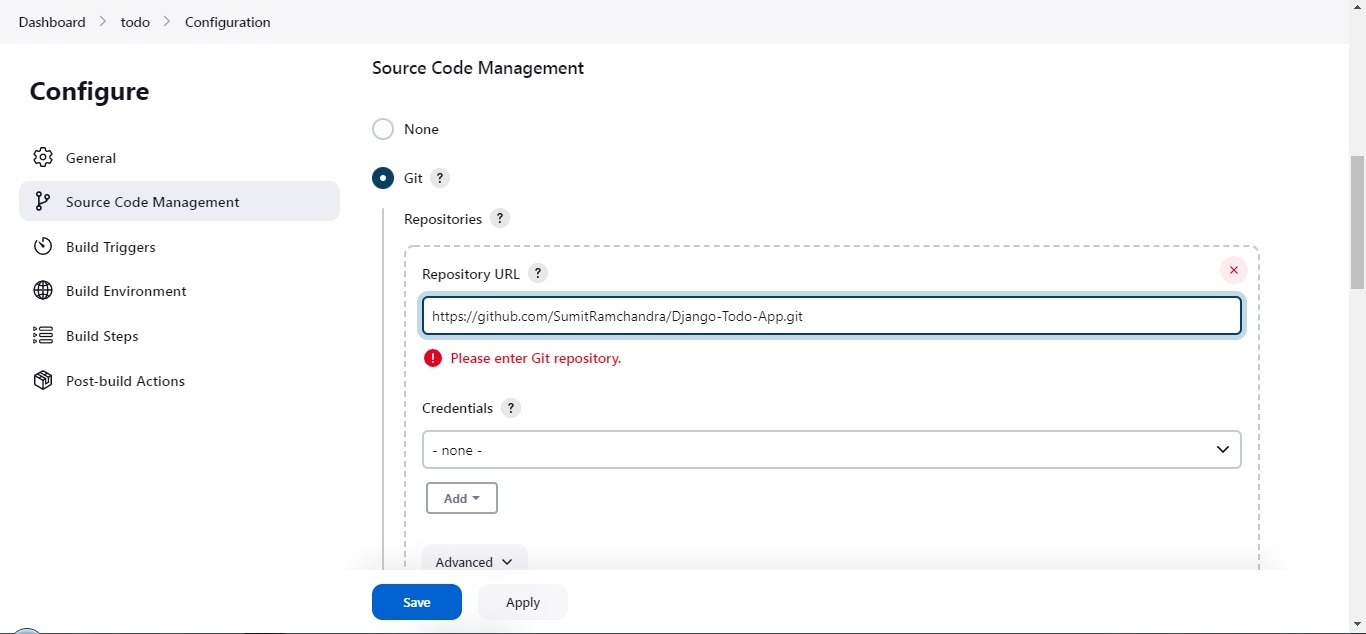
In the Source Code Management select git and paste your GitHub repository URL and add credentials for integration and authentication.
Keep the domain default from the KIND dropdown and select the type of credentials you want, here I am using the Secret text method where can add Personal Access Token generated from GitHub.
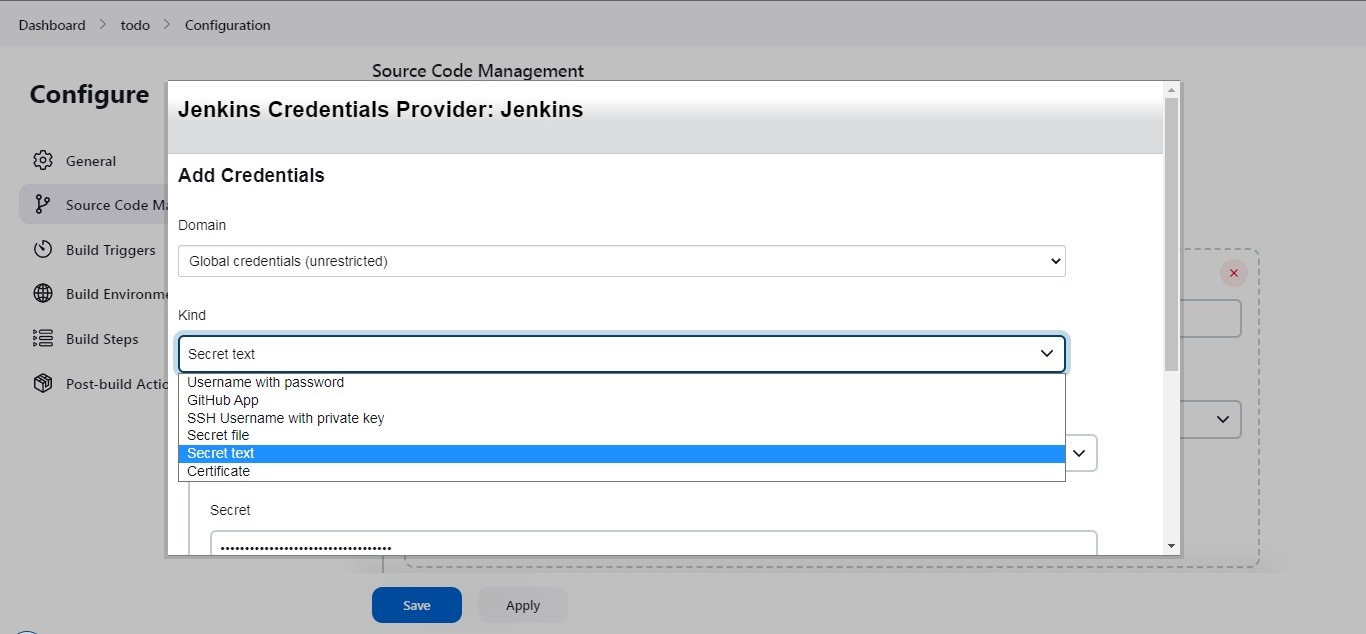
give it an ID and description and click on add.
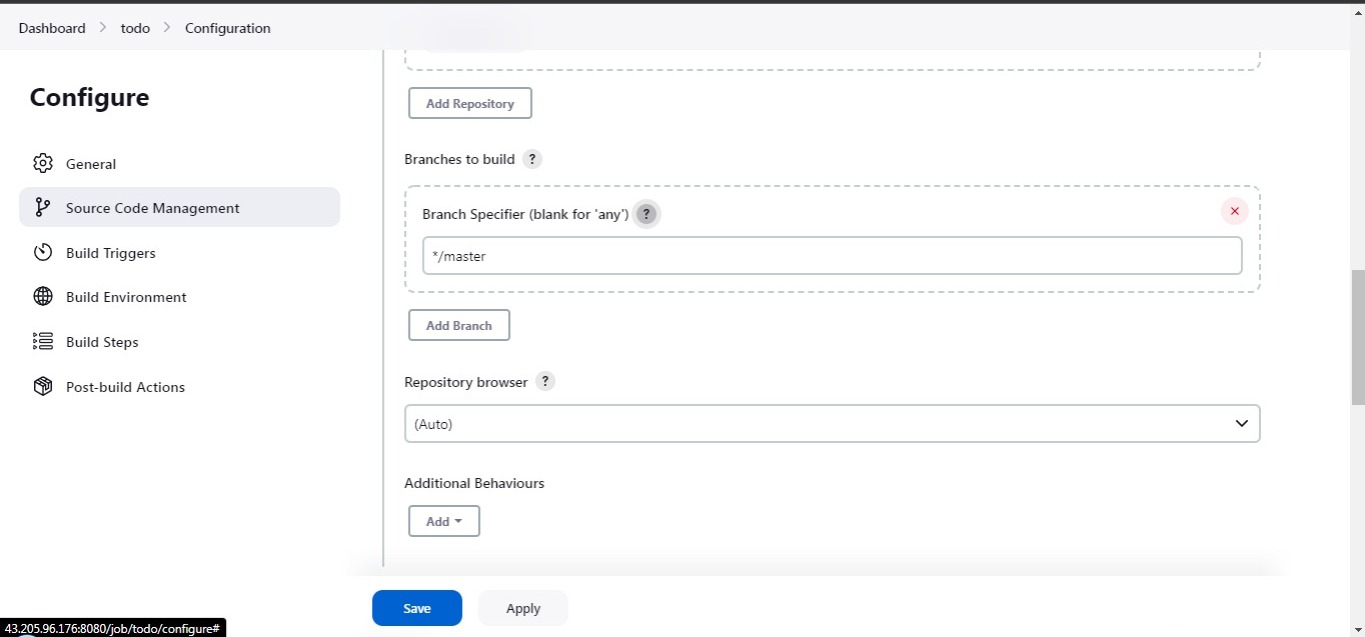
Specify the branches if you'd like to track a specific branch in a repository. If left blank, all branches will be examined for changes and built.
In the "Build" section of the project, Execute the shell and add a build step to run the "docker build" command to build the image for the container.
Add a second step to run the "docker run" command to start a container using the image created in the previous step.
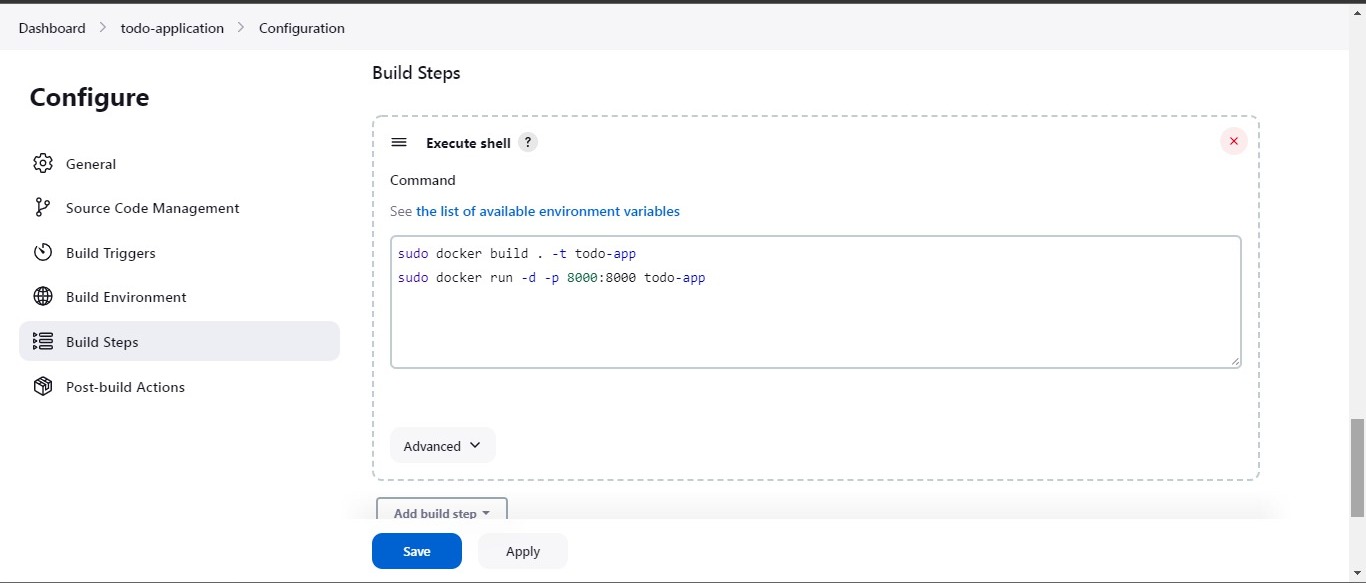
Save the Configuration.
Now you can see the below window.
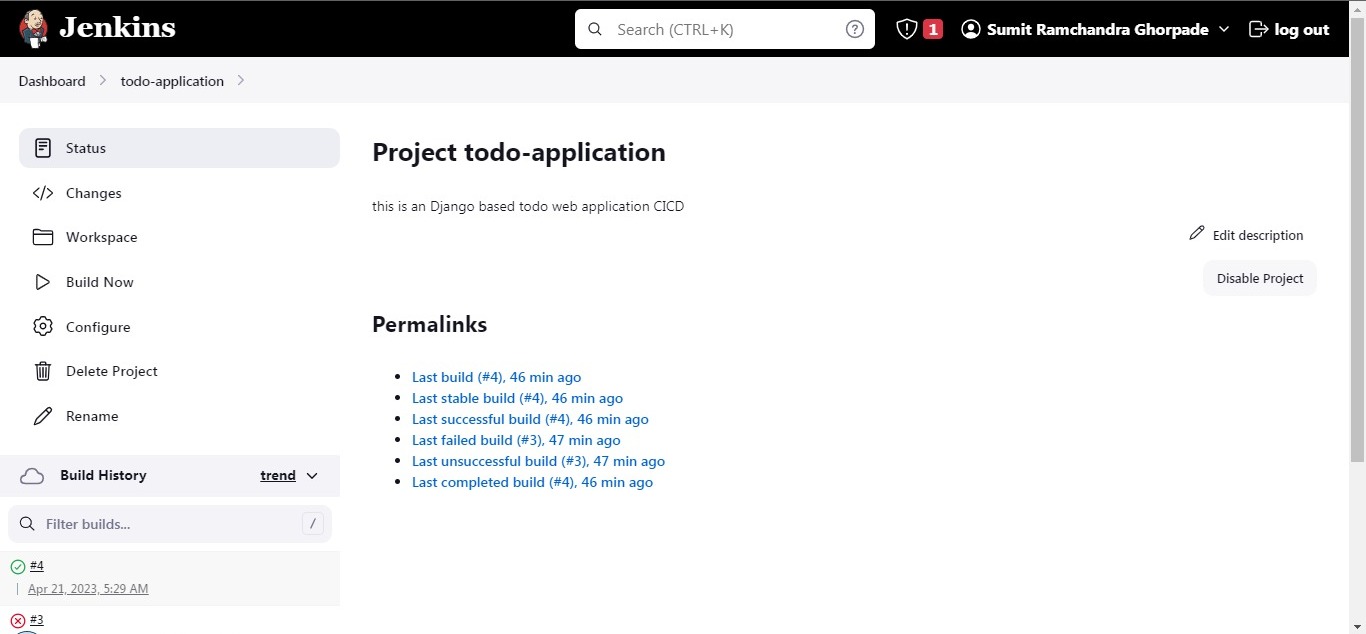
Click on the Build Now button and your project will start building if everything goes well the project will build successfully.
click on the green right button in the built history so that you can see the console output of your project.
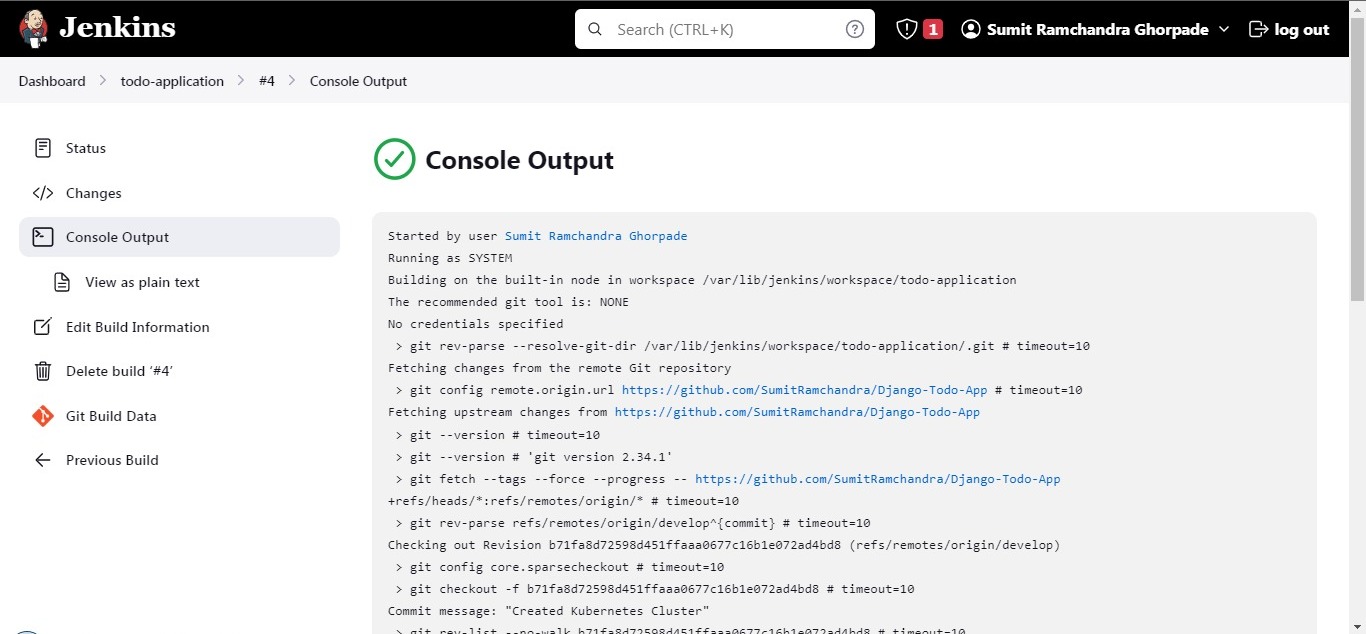

as you can see that my project is deployed successfully.
Expose port 8000 in your security group same as we have done for Jenkin's port 8080. After Allowing the port hit the IP:8000.

Task-02
Create Jenkins project to run the "docker-compose up -d" command to start the multiple containers defined in the compose file (Hint- use day-19 Application & Database docker-compose file)
Set up a cleanup step in the Jenkins project to run the "docker-compose down" command to stop and remove the containers defined in the compose file
- Create a docker-compose.yml file inside your project

- In the "Build" section of the project, add a build step "docker-compose down" command to stop and remove the containers defined in the compose file. then add the "docker-compose up -d" command.

make sure to install docker-compose in the terminal.
Build the project.
After a build is completed, you can view the console output.
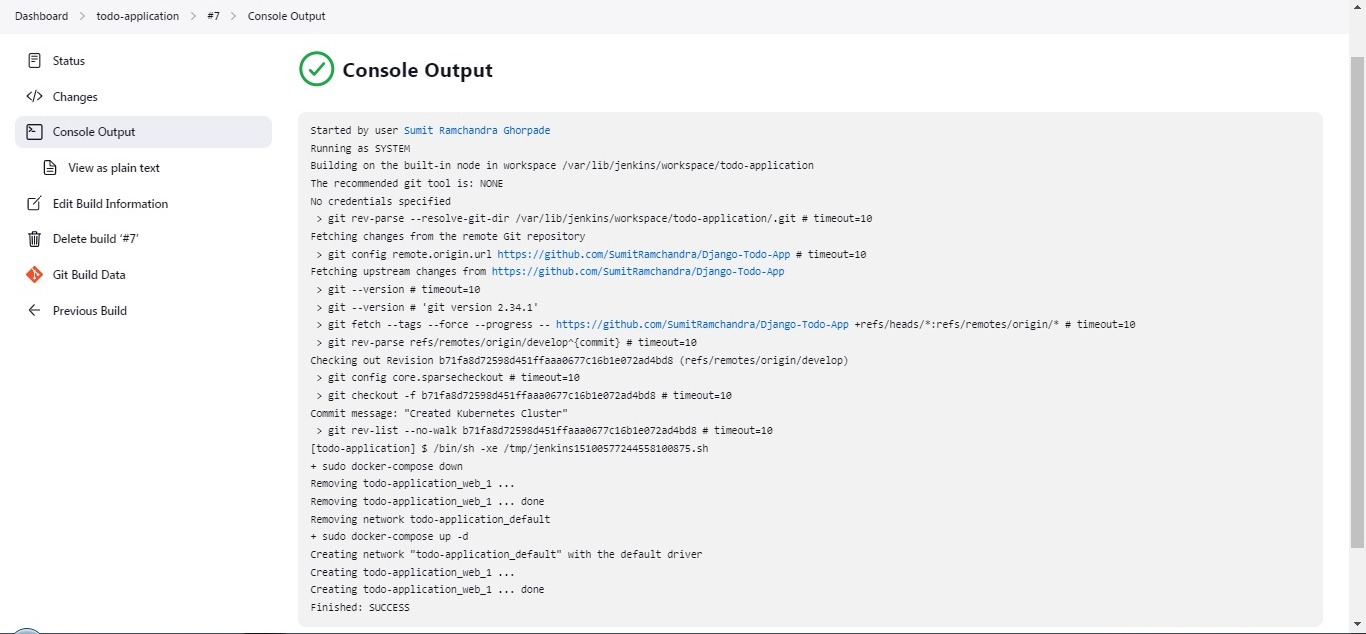
- You can see the container is created.

- Browse IP:8000
That's all for today.
In this way, you can create a freestyle project.
~~~~~~~~~~~~~~~
Hope you find this helpful. Thanks for Reading.
Visit my GitHub repository for source code and solutions.
Happy learning !!!
Suggestions are always welcome.
Thank You - Shubham Londhe


