Jenkins Declarative Pipeline

I am a Certified AWS Cloud Practitioner and heading towards becoming a Devops Engineer.
- What is a pipeline in Jenkins?
In Jenkins, a pipeline is a set of instructions that specify the steps necessary to build, test, and deploy software applications. It is a script that defines the entire workflow of the software delivery process, from code checkout to production deployment.
Jenkins pipeline is based on the Groovy programming language, which allows you to write code that defines the pipeline stages, steps, and logic. A pipeline can be created in either Declarative or Scripted syntax. Declarative pipeline provides a simpler and more intuitive syntax for defining pipelines, whereas Scripted pipeline provides more flexibility and control over the pipeline flow.
A pipeline in Jenkins can be triggered manually or automatically, based on various events such as code commits, pull requests, or schedules. It can also be configured to run on multiple agents or nodes, enabling distributed builds and testing.
Jenkins pipeline provides a powerful and flexible way to automate the entire software delivery process, from continuous integration to continuous delivery and deployment, and it is widely used in DevOps teams to streamline their software delivery pipeline.
- Why you should have a Pipeline?
The definition of a Jenkins Pipeline is written into a text file (called a Jenkinsfile) which in turn can be committed to a project’s source control repository.
This is the foundation of "Pipeline-as-code"; treating the CD pipeline as a part of the application to be versioned and reviewed like any other code.Creating a
Jenkinsfileand committing it to source control provides several immediate benefits:Automatically creates a Pipeline build process for all branches and pull requests.
Code review/iteration on the Pipeline (along with the remaining source code).
- What is a Declarative pipeline?
The declarative pipeline is a way to define pipelines in Jenkins using a structured, human-readable syntax. It is designed to provide a simpler and more intuitive way of creating pipelines, especially for those who are new to Jenkins or have limited experience with scripting languages.
In Declarative syntax, the pipeline is defined using a set of predefined keywords that specify the various stages, steps, and conditions of the pipeline. This approach makes it easier to read and understand the pipeline code and helps to ensure that pipelines are consistent and maintainable.
Pipeline syntax
pipeline {
    agent any
    stages {
        stage('Build') {
            steps {
                sh 'mvn clean package'
            }
        }
        stage('Test') {
            steps {
                sh 'mvn test'
            }
        }
        stage('Deploy') {
            steps {
                sh 'mvn deploy'
            }
        }
    }
}
In this example, the pipeline is defined with three stages: Build, Test, and Deploy. Each stage contains a single step that executes a Maven command to build, test, or deploy the application. The agent keyword specifies that the pipeline can run on any available agent.
Declarative pipelines provide several benefits, including:
Readability: The syntax is easier to read and understand, especially for those who are new to Jenkins or have limited experience with scripting languages.
Maintainability: Declarative pipelines are more structured and consistent, which makes them easier to maintain and update over time.
Reusability: Pipeline code can be reused across multiple projects or pipelines, which helps to save time and effort.
Security: Declarative pipelines provide improved security features, such as sandboxing and whitelisting of commands, which helps to prevent unauthorized access or execution of malicious code.
Overall, the Declarative pipeline is a powerful and flexible way to define pipelines in Jenkins and is widely used in DevOps teams to automate their software delivery process.
Task
Create a New Job, this time select Pipeline instead of Freestyle Project.
Follow the Official Jenkins Hello World example.
Complete the example using the Declarative pipeline.
To get started quickly with Pipeline:
Install the Docker Pipeline plugin through the Manage Jenkins > Plugins page
After installing the plugin, restart Jenkins so that the plugin is ready to use.
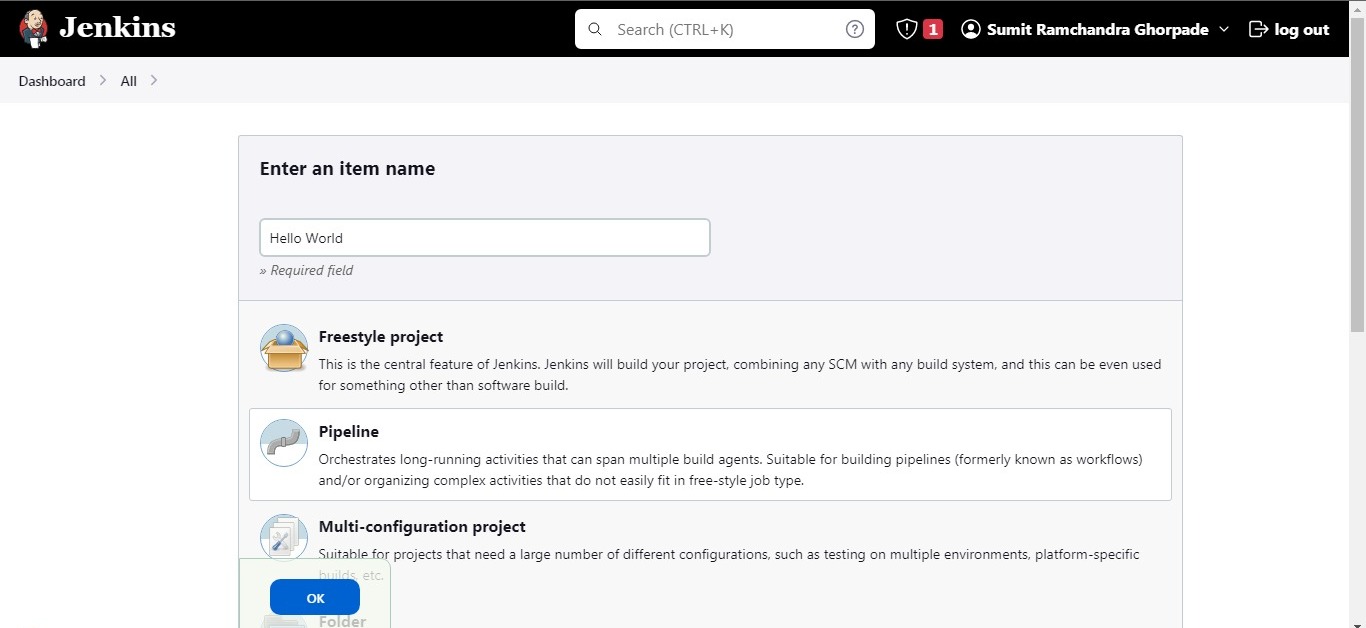
To create a Declarative pipeline in Jenkins, go to Jenkins UI and click on New item.
Enter the pipeline name and select Pipeline, and then click on ok.
- Go to the project configuration page.
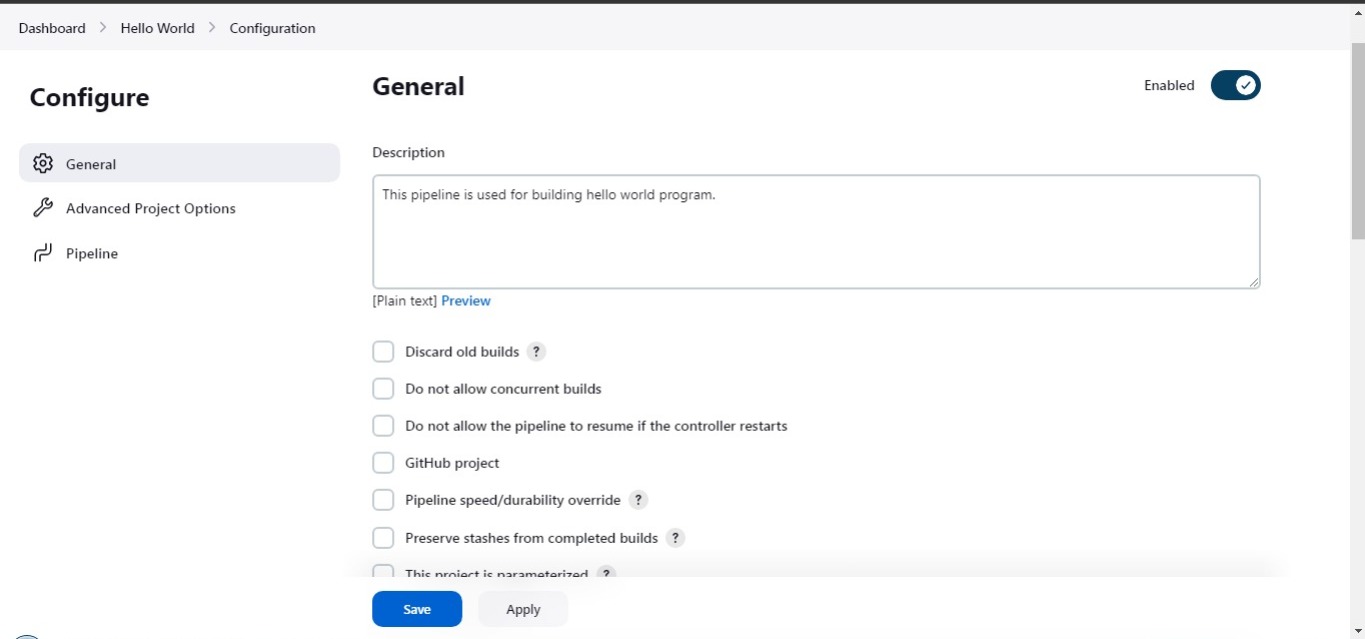
- In the “Pipeline” section, define the Pipeline script.
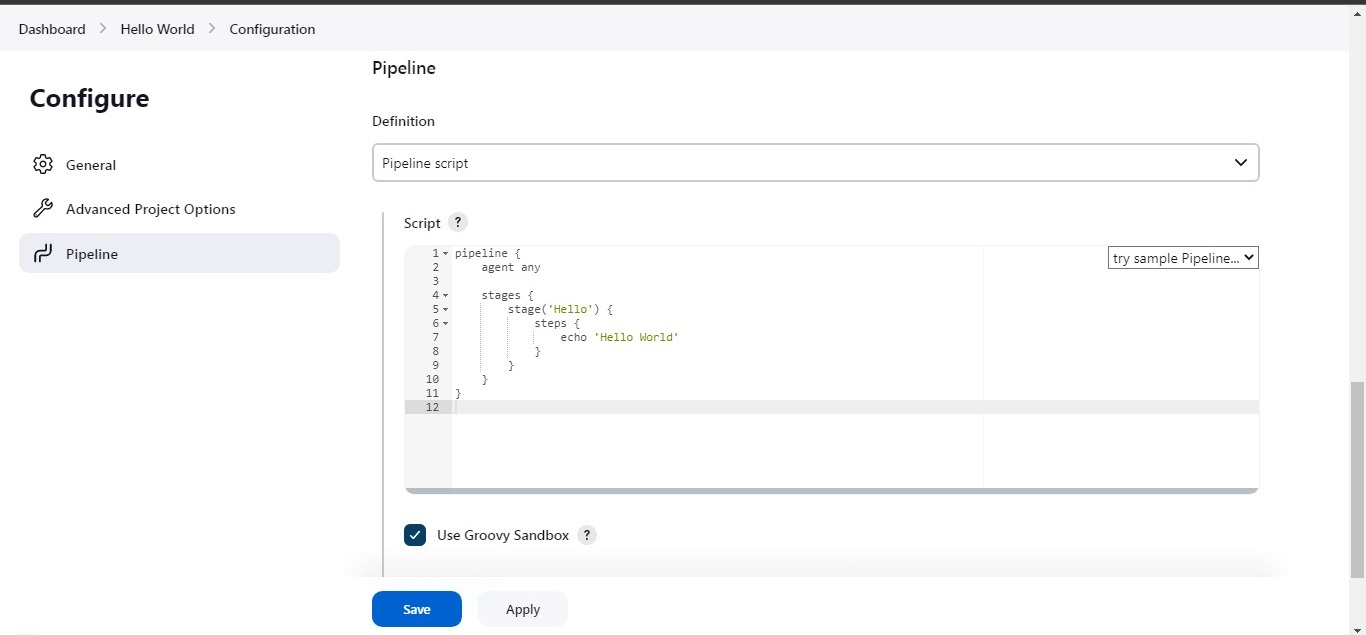
Write a pipeline script and save changes.
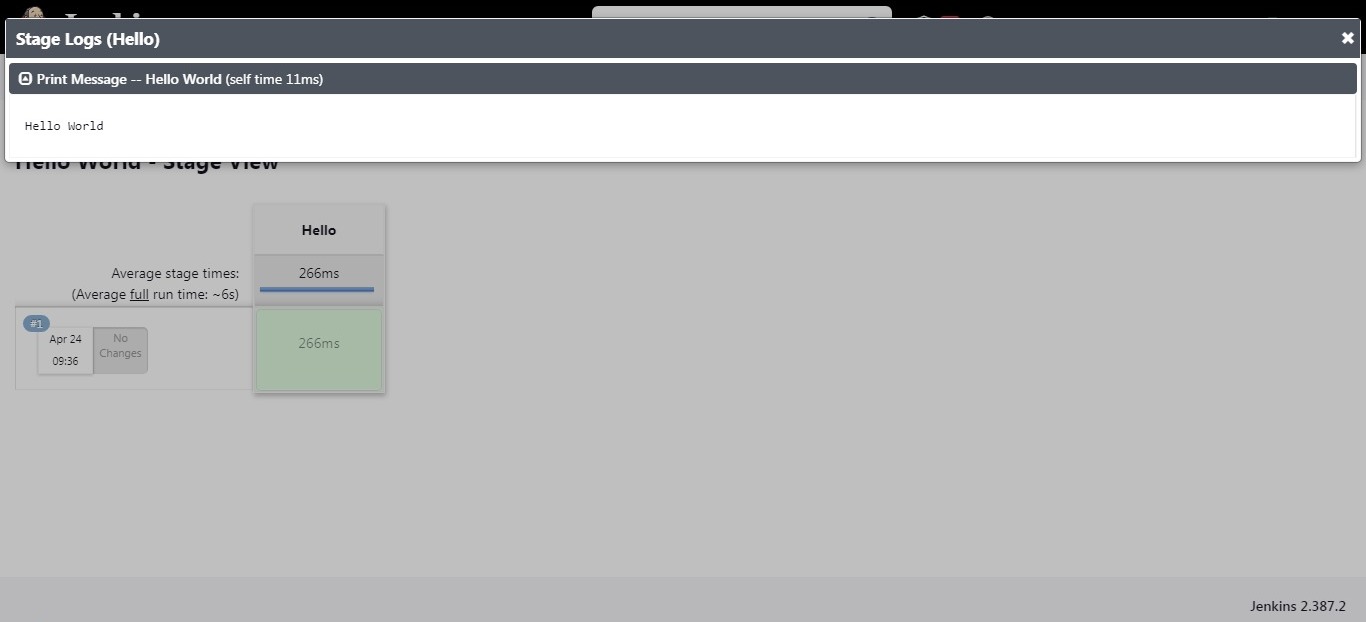
Build the project. You can manually build the project by clicking on the "Build Now" link on the project's main page.
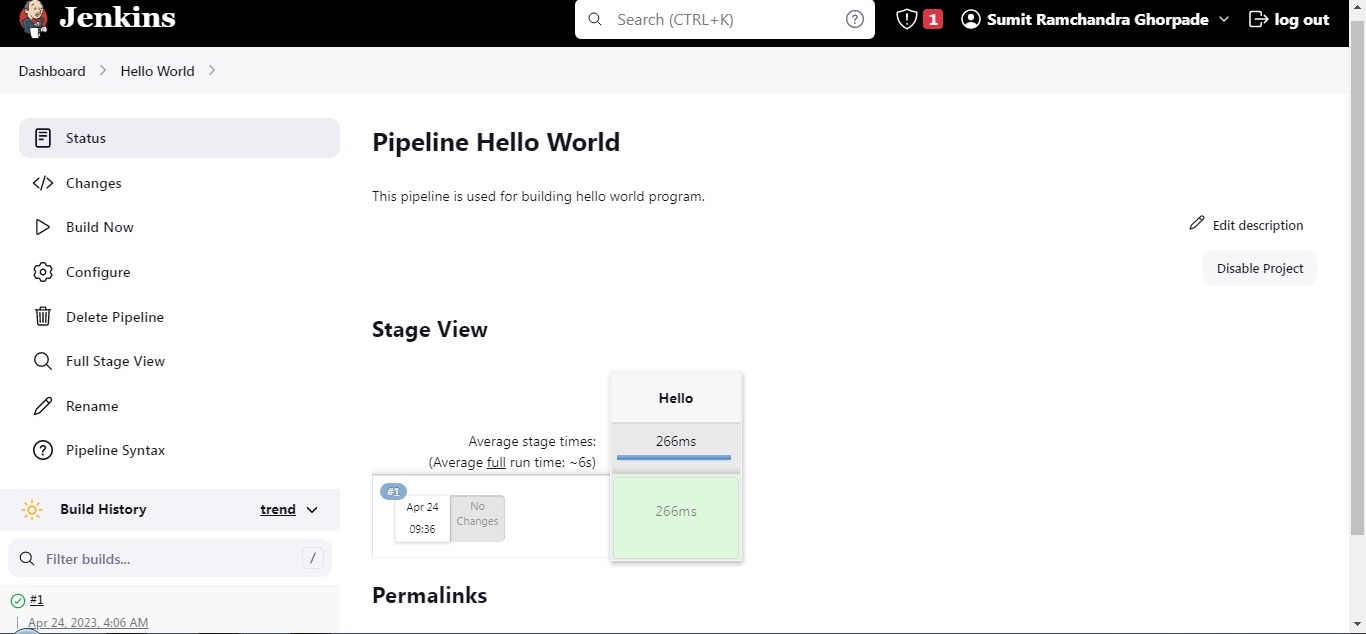
- After a build is completed, you can view the console output by clicking on the "Console Output" link on the build page.
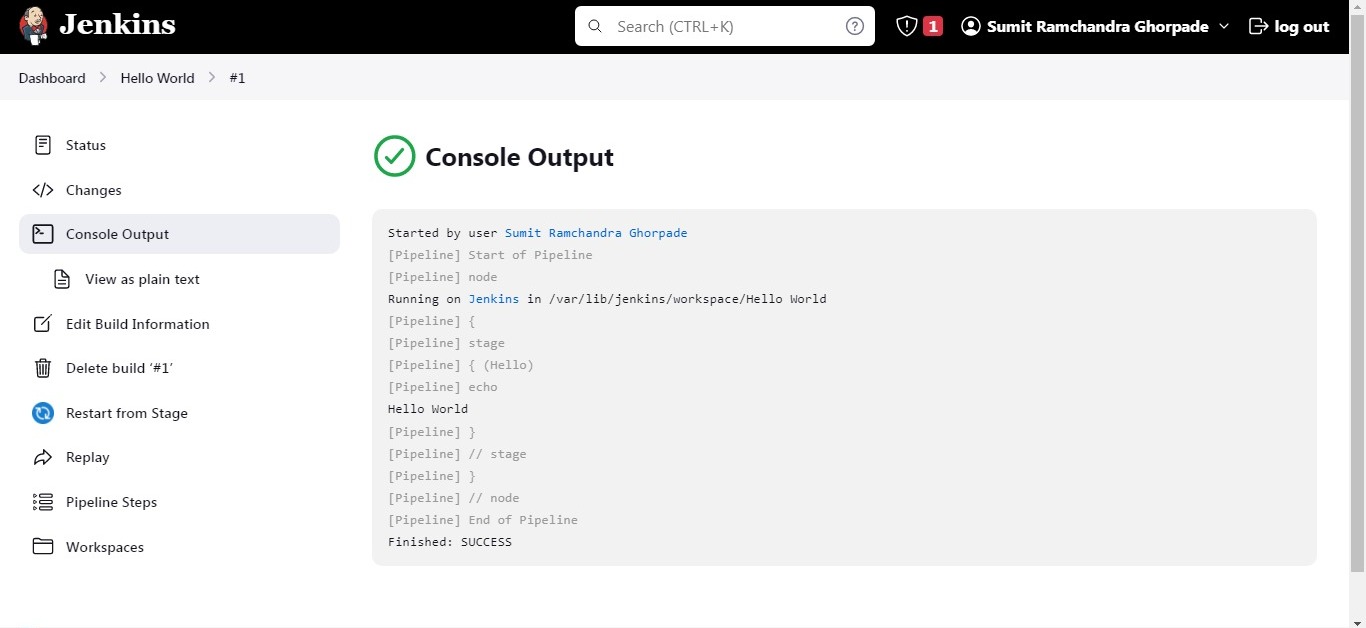
- As you can see from the above output, the Pipeline run successfully and printed Hello World.
In this way, you can create a Declarative pipeline. This was the simplest project, in the upcoming sessions we will see more advanced projects.
Hope you find this helpful. Thanks for Reading.
Happy learning !!!
Suggestions are always welcome.


